
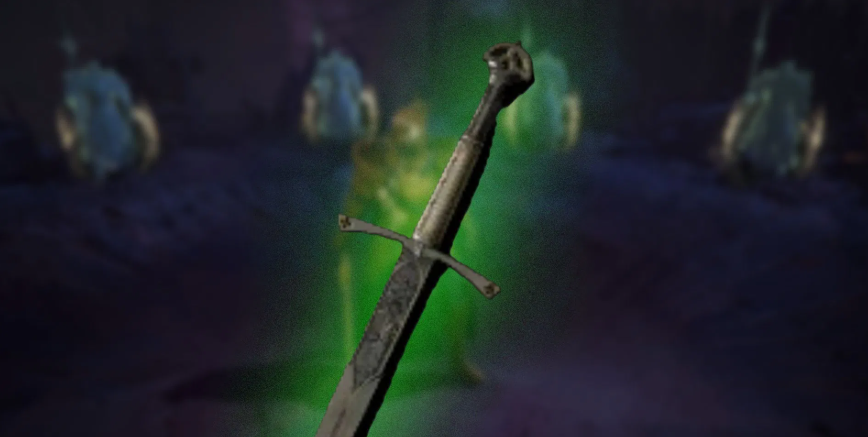
How to get Red Sermon in Diablo 4

For Diablo 4 Paladin players seeking an aggressive, melee-focused playstyle, Red Sermon stands as one of the most coveted unique weapons. This two-handed sword redefines Zeal-based builds by trading faith costs for health-fueled attacks, turning the Paladin into a relentless zealot on the battlefield.

More than just a damage-dealing tool, Red Sermon unlocks synergies that transform how players engage with enemies. Whether you’re a seasoned endgame player or crafting a new Season 11 build, understanding its unique effects and farming strategies is key to mastering this powerful weapon.

What Is Red Sermon? Core Identity and Rarity

Red Sermon is a Paladin-exclusive unique two-handed sword, tailored for builds centered around the Zeal core skill. Its design leans into high-risk, high-reward combat, prioritizing raw damage over traditional Paladin survivability.

As a Season 11-relevant unique, it’s tied to endgame content and specific boss drops, making it a target for players looking to optimize their Zealot builds. Unlike common loot, Red Sermon’s unique power and inherent affixes set it apart as a build-defining Diablo 4 Items.

Unique Effects: Transforming Zeal into a Relentless Onslaught

The true power of Red Sermon lies in its unique passive ability, which reshapes how the Zeal skill functions. It grants Zeal (120-180)% increased damage and automatically unlocks the “Death or Glory” upgrade for free . This upgrade is a game-changer for aggressive playstyles.

Death or Glory normally replaces Zeal’s faith cost with health consumption, allowing for seemingly unlimited attacks as long as health is sustained. Additionally, it modifies Zeal to strike in a circle around the Paladin, boosting both damage and critical strike chance .

By unlocking Death or Glory for free, Red Sermon frees up a skill upgrade slot. Players can select a second Zeal upgrade, stacking effects to create even deadlier combos. This flexibility makes it a cornerstone of optimized Zeal builds .

Inherent Affixes: Boosting Damage and Sustainability

Beyond its unique power, Red Sermon comes with fixed inherent affixes that complement its playstyle. These affixes enhance damage output, skill synergy, and survivability-critical for balancing its health-cost mechanic.

The sword grants a massive +170.0% critical strike damage, amplifying Zeal’s burst potential. It also rolls with (52.0-70.0)% chance for Zeal to deal double damage, turning lucky strikes into devastating blows .

For skill synergy, it adds (2-4) to Zealot skills, strengthening passive and active abilities tied to the Zealot archetype. Defensively, it provides (415-452) life on hit (varies by roll), helping offset the health drain from Death or Glory .

Finally, it boosts strength by (176-204), a key stat for Paladins that increases both damage and armor. These affixes work in tandem to create a weapon that rewards aggressive play while mitigating its risks .

How to Get Red Sermon: Targeted Farming Strategies

Red Sermon can drop from general loot sources like activity rewards and chests, but these methods rely heavily on luck. For efficient farming, target specific endgame bosses and activities with higher drop rates.

Boss Drops: Highest Chance Sources

Three bosses stand out as the primary sources for Red Sermon: Lord Zir, Varshan, and Verdict. Each has a significantly higher drop rate than random loot, making them the top targets for farmers .

Varshan, also known as the Echo of Varshan, resides in the Malignant Burrow in Hawezar’s Writhing Mire. Summoning Varshan requires Malignant Hearts, earned through Tree of Whispers bounties-easily farmed during Helltide events .

Lord Zir and Verdict are also reliable sources, with Verdict dropping Red Sermon alongside other Paladin uniques like Cathedral’s Song. Focus on summoning these bosses repeatedly to maximize your odds .

Alternative Farming Methods

Helltide Weapon Chests offer another path to Red Sermon. These chests, found during Helltide events, have a chance to drop unique weapons. Combine Helltide farming with Varshan material collection for dual-purpose efficiency .

Purveyors of Curiosities, located in major towns, let you gamble for weapons using Obols. While this method is luck-dependent, it’s a solid option if you’re swimming in Obols from endgame activities .

Some players also report drops from The Beast in Ice, though this is less consistent than boss farming. Diversify your farming routine to include multiple sources and reduce grind fatigue .

Build Synergies: Maximizing Red Sermon’s Potential

Red Sermon shines in Zealot Paladin builds, where its Death or Glory synergy and Zealot skill boost create unstoppable momentum. Success with this weapon hinges on balancing damage output and health sustain.

Prioritize life sustain through gear and skills. Look for life on hit affixes on rings, max life rolls on armor, and use skills like Holy Light Aura to heal during combat . This offsets the health cost of Zeal and keeps you in the fight.

Pair Red Sermon with Fanaticism Aura for increased attack speed and enemy weakening, or Defiance Aura for extra armor if survivability is a concern . Aspects like Celestial Strife and Zealot’s Covenant further amplify damage and synergy .

For advanced players, the “Spin2Win” Zeal build leverages Red Sermon’s area-of-effect Zeal strikes to clear mobs quickly. This off-meta build prioritizes damage over defense but delivers satisfying, fast-paced gameplay .

Final Tips for Mastering Red Sermon

Patience is key when farming Red Sermon-unique drops are never guaranteed, even from high-chance bosses. Focus on efficient boss summoning rotations and combine farming with other endgame goals, like leveling glyphs or collecting aspects.

Optimize your gear for both damage and sustain. Prioritize strength, critical strike chance, and life on hit to make the most of Red Sermon’s kit . Avoid Hardcore mode with this build unless you’re confident in your sustain-its squishiness can lead to sudden deaths .

Experiment with skill upgrades. Since Red Sermon unlocks Death or Glory for free, pair it with upgrades like Enhanced Zeal or Charged Zeal to tailor your playstyle. This flexibility is what makes Red Sermon a standout unique for Paladins.

Conclusion

Red Sermon is more than just a weapon-it’s a gateway to a high-octane Paladin playstyle that trades caution for relentless damage. Its unique Death or Glory synergy, powerful affixes, and build flexibility make it a must-have for Zealot enthusiasts. If you want to become stronger more quickly, you can also choose to buy cheap Diablo 4 materials to help yourself.

By targeting bosses like Varshan and Lord Zir, optimizing your gear for sustain, and experimenting with skill combinations, you’ll turn Red Sermon into a force to be reckoned with in Sanctuary. Embrace the zealot’s path, and let this sword be your psalm of destruction .


Call of Duty:Black Ops 7 Zombies:Tips for Surviving Ashes of the Damned

Black Ops 7 Zombies pushes the Dark Aether storyline forward with a return to classic round-based survival, but Ashes of the Damned is anything but traditional. This massive map introduces new systems, high-risk traversal zones, and mechanics that can overwhelm new players fast. Understanding how to build momentum early is the difference between a short run and a deep high-round attempt.

Farm Dark Aether Plants Early for Massive Value

One of the strongest early-game systems on Ashes of the Damned is also one of the most ignored:Fumigators and Dark Aether Plants.

Throughout the map, you’ll spot orange Fumigator canisters highlighted in white. These are commonly found around areas like Janus Towers Plaza, Ashwood, and Vandorn Farm.

When you locate a Dark Aether Plant:

Interact with it to activate the Fumigator

Defend the plant while zombies attack it

Let it fully mature into its purple form

Once complete, the plant detonates and showers the area with loot. Rewards can include:

Essence

Salvage

Weapons

Armor pieces

Rare bonus items

Because zombies prioritize the plant instead of you, this method is both safe and extremely profitable. It’s one of the fastest ways to gear up without burning Essence on early wall weapons.

Armor Comes Before Everything — Even Jugger-Nog

Early Essence management defines your entire match. While Perks are tempting, Tier 2 Armor should be your first major purchase.

Armor provides immediate damage reduction, allowing you to:

Survive mistakes

Play aggressively during objectives

Tank hits that would normally down you

Unlike Perks that offer gradual benefits, armor directly reduces incoming damage. Getting Tier 2 Armor as soon as possible often keeps runs alive longer than buying Jugger-Nog first. Once armor is secured, you can safely invest in Perks.

Learn Ol’ Tessie — Your Key to Map Control

Ashes of the Damned introduces Ol’ Tessie, a hybrid Wonder Vehicle that functions as both transportation and a mobile Pack-a-Punch unit. Mastering this mechanic is mandatory for long runs.

How to Unlock Ol’ Tessie

Start in Janus Towers Plaza

Head to the Server Room

Melee the glowing floor section to retrieve T.E.D.D.’s Head

Attach the head to Ol’ Tessie to activate the vehicle

Safe Travel Across the Map

Large stretches of the map are separated by dangerous no-man’s-land zones that spawn endless high-tier zombies. Attempting to cross these areas on foot is a death sentence.

The solution:drive Ol’ Tessie at full speed to bypass these zones safely.

Repairs and Recovery

If Ol’ Tessie takes too much damage, it can be destroyed. If this happens:

Travel to Ashwood

Pay around 1,000 Essence to respawn or teleport to the vehicle

Mobile Pack-a-Punch

After upgrading Ol’ Tessie in Ashwood, it becomes your portable Pack-a-Punch machine. This allows you to upgrade weapons safely without camping static locations, especially useful in later rounds.

Upgrade Weapon Rarity Using the Arsenal

Damage scaling in Black Ops 7 Zombies isn’t just about Pack-a-Punch. Weapon rarity plays an equally important role.Whether you’re learning the basics or polishing advanced strategies, MMOexp CoD Black Ops 7 Bot Lobbies provide a safe, relaxed space to play, experiment, and improve without pressure.

Arsenal machines, found across the map, allow you to spend Salvage on:

Weapon rarity upgrades

Ammo Mods

Armor repairs

Increasing rarity dramatically boosts a weapon’s base damage, helping you stay ahead of the round difficulty curve. Salvage is earned naturally through kills and certain attachments like Suppressors, so make use of it often.

Recommended Ammo Mods

Napalm Burst – Extremely effective against Zursa bear enemies

Cryo Freeze – Crowd control and slowing effects

Brain Rot – Turns enemies into temporary allies

Combining rarity upgrades with Ammo Mods is the most efficient way to scale into high rounds.

Unlock Augments for Permanent Progression

Before loading into a match, don’t skip the Augment Research menu. Augments provide permanent bonuses that apply to every game.

You can enhance:

Perks (stronger defenses, faster effects)

Ammo Mods (improved elemental triggers)

Field Upgrades (better cooldowns or utility)

These upgrades stack over time, meaning every match becomes easier as your loadout improves. Investing in Augments is one of the best long-term strategies in Black Ops 7 Zombies.

Ashes of the Damned is Black Ops 7 Zombies at its most complex and rewarding. By:

Farming Dark Aether Plants early

Prioritizing armor over Perks

Mastering Ol’ Tessie for traversal and upgrades

Scaling damage through Arsenal upgrades

Researching Augments for permanent power

You’ll build the foundation needed to survive deep into high rounds.

For players who want to learn routes, perk orders, or map flow without pressure, many choose to practice in Call of Duty:Black Ops 7 Bot Lobbies, and some even opt to buy CoD Black Ops 7 Bot Lobbies as a risk-free way to master the map before jumping into live matches.Practice better. Progress faster. Dominate smarter—with MMOexp cheap CoD BO7 Bot Lobbies.

Diablo 4 Season 11: Maximize Your Gear with Celestial Upgrades

Diablo 4 Season 11 introduces one of the most impactful crafting systems the game has ever seen: Sanctification. Positioned as the final and most powerful stage of gear progression, Sanctification allows players to push a single item to its absolute limits through irreversible, celestial-level upgrades. This system is high-risk, high-reward, offering the potential to create some of the strongest items in Diablo 4 history.

In this guide, we’ll break down what Sanctification is, how it works, how to use it effectively, and the best practices for Season 11 players.

What Is Sanctification in Diablo 4 Season 11?

Sanctification acts as a one-time, irreversible enhancement that locks an item permanently, preventing all further modifications except for socketing Gems or Runes. Once applied, a Sanctified item can no longer be:

·Tempered

·Masterworked

·Enchanted

Because of this, Sanctification is the final step in item crafting. You must complete all standard upgrade routes, including Masterworking, Tempering, and Enchanting, before attempting a Sanctification infusion.

Effects of Sanctifying Gear

Sanctifying a piece of gear can trigger multiple powerful effects, creating massive endgame potential. Key effects include:

·Add a bonus Legendary Aspect – even unique or mythic items can gain hybrid power.

·Upgrade an existing affix into a Greater Affix – critical for maximizing DPS or defensive stats.

·Add a new Sanctification-exclusive affix – bonuses like global skill damage, cooldown reduction, or attack speed.

·Replace one existing affix with a random Sanctification affix – a risky but potentially rewarding change.

·Add 5-25 Quality – increasing all item affixes simultaneously.

·Rare chance for Unique or Mythic power infusion – potentially transforming a standard item into a meta-defining piece.

Blizzard improved the final patch odds to ensure more reliable high-value rolls, making Season 11 Sanctification more rewarding than the PTR testing suggested.

How to Sanctify Items in Diablo 4

Sanctification is unlocked in two phases:

1. Pre-Torment: Early Access via Heavenly Anvil

Before reaching Torment difficulty, players can access Sanctification through the Heavenly Anvil, which appears after defeating a Lesser Evil in specific activities, such as Helltide events.

Steps:

·Defeat a Lesser Evil.

·Receive one opportunity to use the Heavenly Anvil.

·Decline or fail? Defeat another Lesser Evil to retry.

This early access provides a preview of the system but is limited and one-time per event.

2. Post-Torment: Full Access via Heavenly Sigils

After entering Torment difficulty, Heavenly Sigils become the standard currency for repeated Sanctification. These Sigils drop from:

·Seasonal bosses (Astraroth, Belial, Bartok)

·Endgame seasonal content

·Seasonal event rewards

Stockpiling Diablo 4 materials ahead of time can help streamline the Sanctification process.

Potential Sanctification Buffs

Sanctification offers a curated pool of elite buffs, making it one of the most impactful crafting decisions in the season. Possible buffs include:

1. Add a New Affix

·+All Skills

·Cooldown Reduction (CDR)

·Attack Speed

·Resource Generation

·Damage Reduction

2. Add a Legendary Aspect

·Boosts hybrid or unique gear combinations.

·Upgrade Existing Affix → Greater Affix

·Crucial for min-maxing top-tier builds.

3. Replace an Existing Affix

·Risky, as you may lose a valuable stat, but it can create exceptional combinations.

4. Free Durability Removal

·Minor but permanent benefit.

PTR testing suggested inconsistent rolls, but final Season 11 patches increased the odds for high-value outcomes, making planning essential.

When to Sanctify Your Gear

Timing is critical because Sanctification is final and irreversible. Follow these best practices:

1. Fully Complete Your Item

Ensure the item has:

·Maxed Masterwork ranks

·Full Tempering

·Correct Enchant

·Appropriate Legendary Aspect

·Ideally, multiple Greater Affixes

Sanctifying prematurely risks locking your gear into mediocrity.

2. Maintain a Backup

Even with improved odds, bad rolls are possible. Always keep:

·Duplicate rare items

·Backup pieces with similar or better affixes

·Extra crafting materials, or consider buying Diablo IV Items, to protect your main gear

3. Finalize Your Build

Only Sanctify items for finalized endgame builds, since the process cannot be undone.

4. Target Meta-Builds

Sanctification enables:

·Global skill damage stacking

·Dual Aspects

·Mythic infusion builds

·Greater Affix min-maxing

This makes it essential for players looking to create top-tier Season 11 builds.

Final Thoughts

Sanctification in Diablo 4 Season 11 represents a high-stakes, high-reward crafting revolution. Locking in the final stage of gear progression allows players to maximize item potential like never before. Proper preparation, resource management, and strategic timing are essential to avoid bricking your best-in-slot gear.

When applied correctly, Sanctified items can outperform anything seen in previous seasons, defining Season 11’s meta and giving endgame players the tools to push the limits of power in Sanctuary. For anyone serious about endgame optimization, mastering the Sanctification system is essential.

How to Max Out Guns Quickly in Call of Duty: Black Ops 7

Call of Duty: Black Ops 7 proudly markets itself as the biggest, deepest, and most customizable Black Ops experience ever-and the return of Weapon Prestige is one of the standout reasons why.

This guide breaks down everything you need to know about Weapon Prestige: how it works, what you gain, what you lose, and-most importantly-whether the grind is worth your time.

How Weapon Prestige Works in Black Ops 7

Weapon Prestige becomes available the moment a weapon reaches its Maximum Weapon Level. Every gun has a different level cap based on its category-for example, SMGs level faster than marksman rifles, and shotguns often have fewer attachments to unlock. Fortunately, Black Ops 7 offers multiple avenues to earn weapon XP quickly:

·Double Weapon XP Tokens

·Shared XP progression across Multiplayer, Zombies, Co-Op Campaign, and Endgame modes

·XP-boosting challenges tied to kills, assists, and specific weapon usage

·Optimized XP farming inside Call of Duty Black Ops 7 Bot Lobbies

Once you reach the max level of a weapon, you’ll see the option to Prestige it inside the Gunsmith.

How to Prestige a Weapon in BO7

Prestiging a weapon is easy, but understanding the consequences is crucial. Here’s the step-by-step process:

1. Open Create-a-Class and navigate to Gunsmith.

2. Select a weapon that has reached its maximum level.

3. Press the Prestige Weapon option.

4. Confirm the reset to enter the next Prestige tier.

After this point, your weapon level resets to 1 and the grind begins again-although you’ll now earn XP noticeably faster.

However, before you commit, you need to understand what you lose and what you keep.

What You Lose When You Prestige

Prestiging brings some heavy reset penalties:

·Weapon Level resets to 1

·All Gunsmith builds are wiped

·All attachments must be unlocked again

For many players, especially those who rely on full attachment builds for competitive play, this can feel like a major setback. Your gun will feel weaker until you re-level it, and some weapons are simply painful to level without their core attachments.

What You Keep After Prestiging

The good news: all cosmetic progression remains intact. Weapon Prestige does not reset:

·Camos

·Blueprints

·Charms

·Stickers

·Decals

·Reticles

You also retain access to any cosmetic challenges completed before Prestige. So even if you reset the weapon, your hard-earned aesthetics stay safe forever.

All Weapon Prestige Ranks & Rewards in Black Ops 7

Every weapon has three Prestige tiers, culminating in the massive grind known as Weapon Prestige Mastery. Each tier gives rewards that make future leveling easier-or simply flashier.

Weapon Prestige 1 Rewards

·Permanent Attachment Unlock Token

·Prestige Attachment

·Prestige 1 Camo

The Permanent Unlock Token is extremely valuable, letting you permanently equip any attachment on that weapon-even across future Prestiges.

Weapon Prestige 2 Rewards

·Permanent Attachment Unlock Token

·Prestige Weapon Charm

·Prestige 2 Camo

Prestige 2 doubles down on cosmetics and gives another Token to make later grinds smoother.

Weapon Prestige Mastery Requirements

Weapon Prestige Mastery is one of the longest progression systems ever seen in Call of Duty. To reach Mastery, you must level the weapon to:

·Level 100

·Level 150

·Level 200

·Level 250

At these milestones, you unlock multiple rare and universal camouflages. Because the grind is so time-consuming, many players choose to buy CoD Black Ops 7 Bot Lobbies to accelerate leveling-especially while targeting full camo completion.

Prestige Mastery Rewards

·All Attachments Permanently Unlocked

·Prestige Master Camo 1

·Prestige Master Camo 2

·Prestige Master Camo 3

·Prestige Max Camo

All Mastery Camos are Universal, meaning once you unlock them with ANY weapon, you can equip them on ALL weapons in your arsenal. You’ll find them in the Universal Camos tab in the Gunsmith.

Is Weapon Prestige Worth Doing?

Whether you choose to Prestige depends entirely on how you enjoy playing Black Ops 7.

Reasons You Should Not Weapon Prestige

Avoid the Prestige grind if:

·You hate re-leveling guns.

·You rely on full attachments for competitive lobbying.s

·You don’t care about camos or cosmetics

·You prefer stable loadouts with no downtime

·You dislike long-term progression or XP farming

Prestiging absolutely slows down your performance until you re-unlock key attachments.

Reasons You Should Weapon Prestige

Weapon Prestige is worth it if you:

·Love camo challenges

·Enjoy long-term progression

·Want access to rare cosmetics

·Take pride in 100% completing weapons

·Want universal rewards that apply to all guns

The Prestige Camos in Black Ops 7 are some of the cleanest ever released, and the Permanent Unlock Tokens help make future Prestiges far easier.

Final Verdict: A Long Grind-but a Satisfying One

Weapon Prestige in Call of Duty: Black Ops 7 hits the perfect balance between nostalgia and modern progression. Although resetting attachments and re-leveling guns can feel punishing, the long-term rewards-universal camos, permanent unlocks, and Prestige Mastery-make the grind incredibly satisfying for dedicated players.

Whether you’re leveling in standard multiplayer or accelerating progress through Call of Duty Black Ops 7 Bot Lobbies, pushing your weapons through each Prestige tier is one of the most rewarding long-term goals in the entire game.

Path of Exile 3.27 Top 10 Starter Builds You Should Try

With Path of Exile 3.27 now live, the hunt for efficient and powerful league starter builds is on. Picking the right build at the start of a league can save you time, resources, and frustration. Early access to a strong, scalable build ensures smooth progression, fast leveling, and easier access to maps and endgame content. Below are ten standout starter builds that excel in speed, survivability, and long-term scaling—perfect for both newcomers and seasoned veterans.

1.Lightning Arrow Deadeye

    Lightning Arrow remains a favorite for ranged players who enjoy rapid map clearing. Deadeye ascendancy enhances projectile speed and chain effects, letting each shot hit multiple targets at once. High mobility keeps you out of danger, and its damage scales well into late-game maps. Accessible gear requirements make this a reliable choice for a smooth early league experience.Unstoppable momentum—easily acquire POE currency on MMOexp now!

    2.Righteous Fire Chieftain / Juggernaut

      Righteous Fire (RF) continues to be a go-to for players seeking a tanky, burn-focused playstyle. The Chieftain version emphasizes fire damage and regeneration, while the Juggernaut variant prioritizes raw survivability. Walking through mobs while everything around you burns is both satisfying and effective. Early investment in life recovery and fire resistance items will keep this build resilient from the start.

      3.Bone Shatter Juggernaut

        Bone Shatter Juggernaut is a melee powerhouse that combines massive physical damage with high durability. By stacking Trauma, attacks hit harder while Juggernaut defenses ensure you stay in the fight. This build is ideal for players who want a straightforward, tanky melee option with strong scaling for late-game content.

        4.Detonate Dead Elementalist

          Detonate Dead Elementalist turns enemy corpses into explosive weapons. Despite being Witch-based, this build offers surprising tankiness while dealing massive area damage. Ignite and explosion mechanics scale exceptionally well, making it a fun and efficient choice for clearing dense packs or challenging bosses.

          5.Hexblast Mines Trickster

            Trap and mine enthusiasts will love the Hexblast Mines Trickster. Combining Hexblast’s chaos damage with mine detonation mechanics allows for precise, high-burst damage. Trickster ascendancy enhances mobility and survivability, making it a satisfying option for tactical players who like to control the battlefield from a safe distance.

            6.Lacerate Gladiator

              Lacerate Gladiator specializes in bleed-heavy melee combat. Gladiator bonuses boost damage over time while improving block chance, creating a balanced build that’s both offensive and defensive. It’s a dependable choice for players who enjoy aggressive melee play without sacrificing safety.

              7.Explosive Arrow Champion

                Explosive Arrow Champion delivers consistent damage with strong survivability. Each arrow detonates for fiery chaos damage, building fuses on enemies for massive explosions. Champion ascendancy provides fortify and defensive bonuses, making this build perfect for hardcore and SSF players. It’s a solid pick for boss fights and endgame content while remaining easy to gear early.

                8.Cold DoT Elementalist

                  Cold Damage over Time (DoT) Elementalist offers safety and flexibility for spellcasters. Using skills like Vortex and Creeping Frost, this build creates zones of chilling damage that slow and annihilate enemies. With moderate investment in spell damage and energy shield gear, it remains highly effective through maps and scales well without expensive uniques.

                  9.Poison SRS Necromancer

                    Poison SRS Necromancer combines minion play with poison damage for steady, stacking DPS. Fast-attacking spirits provide constant damage while keeping you safe and flexible in positioning. This build offers a unique take on minion-based gameplay with excellent scaling potential.

                    10.Ball Lightning Hierophant

                      Ball Lightning Hierophant is a versatile ranged caster that excels at clearing both mobs and bosses. Firing dozens of orbs, it maintains distance while dealing consistent damage. Hierophant ascendancy ensures good mana sustain and defensive utility, making it an ideal choice for players who prefer “cast and run” strategies.Unleash the power of purchasing cheap Path of exile currency through MMOexp and unlock endless possibilities!

                      These ten Path of Exile 3.27 starter builds showcase a range of playstyles, from fast archers and durable melee fighters to clever trap users and high-damage spellcasters. No matter your preferred combat style, these builds offer reliable early-game progression and solid endgame scaling.