
PoE 2: How to Fight Uber Arbiter & Obtain Calamity Fragments

Path of Exile 2 (PoE 2) is renowned for its challenging endgame content, and few encounters test a player’s build, skill, and patience like the Uber Arbiter of Ash. As the elite variant of the game’s pinnacle boss, Uber Arbiter demands careful preparation, mastery of mechanics, and first access to Calamity Fragments-rare items that unlock this high-stakes fight. This guide breaks down everything you need to know to obtain Calamity Fragments and emerge victorious against Uber Arbiter. Of course, you will also acquire more POE 2 Currency as a result.

What Are Calamity Fragments, and Why Do You Need Them?

Calamity Fragments are a set of three unique pinnacle keys required to access the Uber Arbiter fight at the Burning Monolith. Unlike the Crisis Fragments used for the regular Arbiter encounter, Calamity Fragments are tied to PoE 2’s hardest endgame challenges, ensuring only well-prepared players can face Uber Arbiter.

There are three distinct Calamity Fragments, each dropping from a specific Citadel boss under strict conditions. Without all three, you cannot unlock the Uber Arbiter arena-making fragment farming a critical first step in your endgame journey.

How to Obtain Calamity Fragments: Step-by-Step

Acquiring Calamity Fragments is no easy task. Unlike Crisis Fragments, which drop freely from Citadel bosses, Calamity Fragments require you to maximize the difficulty of Citadel encounters by investing in your Boss Atlas Passive Tree.

1. Unlock the Boss Atlas Passive Tree

First, progress through PoE 2’s Atlas of Worlds to unlock the Boss Atlas Passive Tree. You’ll need to allocate all 10 points in this tree to unlock the hardest versions of Citadel bosses-this is non-negotiable for Calamity Fragment drops. These points enhance Citadel difficulty and replace Crisis Fragment drops with Calamity Fragments.

2. Farm the Three Citadel Bosses

Each Calamity Fragment is tied to a specific Citadel and its boss. Here’s which fragment drops from where:

Primary Calamity Fragment: Dropped by Count Geonor in the Iron Citadel. It bears a pictograph of a lunar eclipse, stained crimson by corruption.

Secondary Calamity Fragment: Dropped by Jaman Ra, the Abomination in the Copper Citadel. Its design shows three stones placed at the foot of a great tower.

Tertiary Calamity Fragment: Dropped by Doryani, Royal Thaumaturge in the Stone Citadel. It features vast flames sweeping across mountains and forests.

3. Optimize Your Drop Rate

While Calamity Fragments are guaranteed drops from their respective Citadel bosses (once the Boss Atlas tree is maxed), you can increase your yield by stacking “Waystone Drop Chance” modifiers. These modifiers, found on Waystones or Atlas Passives, boost the number of fragments dropped per boss kill-critical for farming extra sets or trading.

Preparing to Fight Uber Arbiter: Build & Gear Tips

Uber Arbiter (level 84) is far deadlier than its regular counterpart (level 84), with 22.6 million health and devastating physical and fire damage. To survive, your build must prioritize two core things: fire resistance and mobility.

Aim for capped fire resistance (75%) and additional fire mitigation through gear or passives-Uber Arbiter’s attacks deal massive fire damage, and even a single hit can wipe underprepared builds. Mobility is equally crucial; many of his attacks require quick dodges, so invest in movement speed or dash skills.

Defensively, prioritize armor and physical damage mitigation to handle his sword attacks. Offensively, focus on high burst damage to phase him quickly-Uber Arbiter’s mechanics grow more punishing as the fight progresses, so minimizing fight duration is key.

Uber Arbiter Fight Mechanics: Phase 1 & Phase 2

Uber Arbiter’s fight has two distinct phases, each with unique mechanics. Learning to recognize his telegraphed attacks is the difference between victory and defeat.

Phase 1 (100% – 50% Health)

In Phase 1, Uber Arbiter wields a claw scepter and uses a mix of long-range and area-of-effect (AoE) attacks. Watch for these key moves:

Fire Beam: A long, channeled beam of fire that deals continuous damage. Dodge sideways to avoid it-telegraphed by the boss hovering his scepter forward.

Flaming Gales: The arena fills with red mist, leaving a narrow safe strip. When Uber Arbiter points his weapon, the mist explodes into flames-stay in the strip and adjust as he changes directions.

Falling Flame Seed: A fire seed falls from the sky, marking a circle. The area outside the circle explodes after a short delay-stay inside the circle to avoid one-shot damage.

Bullet Hell: Slow-moving fire orbs spawn and shoot small projectiles in all directions periodically. Keep moving to avoid being overwhelmed by the projectiles.

Phase 2 (Below 50% Health)

At 50% health, Uber Arbiter becomes temporarily immune, teleports to the arena center, and swaps his scepter for a sword. He retains Phase 1 attacks but adds new, deadlier moves:

Sword Beam: A wide flaming gale paired with a long fire beam. Sidestep to avoid the beam and stay clear of the gale’s path.

Donut Bullet Hell: A flaming orb spawns and fires rings of small projectiles that chain-explode on contact. Keep your distance and dodge the rings as they expand.

Summon Seeds: Periodically spawns a chill seed and black flame seed at opposite ends of the arena. Stepping on one creates hazardous ground-use the opposite seed to nullify the effect.

Sword Combo: Aggressive sword swings (2-3 hits) while moving forward. Backpedal or dash away to avoid being hit by the slashes.

Key Tips for Beating Uber Arbiter

Watch for Dodge Cues: Uber Arbiter’s deadliest attacks are marked by a red flash and sound cue-always prioritize dodging these, even if it means pausing your damage output.

Manage Respawns: Uber Arbiter technically allows 2 respawn attempts, but respawning will downgrade the fight to the regular Arbiter encounter. Plan each attempt carefully to avoid restarting.

Avoid Phase Transitions During Flame Seeds: If possible, don’t push Uber Arbiter to Phase 2 while he’s using Falling Flame Seeds-combining Phase 2 mechanics with flame seeds increases the risk of a wipe.

Prioritize Mobility: Use flasks or skills that boost movement speed to quickly reposition during Flaming Gales and Bullet Hell phases. Quick movement is the best defense against Uber Arbiter’s AoE attacks.

Rewards for Beating Uber Arbiter

The effort to obtain Calamity Fragments and beat Uber Arbiter is well worth it. Victories yield top-tier loot, including unique jewels, high-tier maps, exclusive crafting bases, and rare Atlas progression items. These rewards are essential for optimizing endgame builds and dominating PoE 2’s late-game content. Get ready to empower yourself with the help of poe2 trade, making it easier to defeat your enemies.

In summary, defeating Uber Arbiter requires two core steps: farming Calamity Fragments by maxing your Boss Atlas tree and mastering his phase mechanics. With the right build, preparation, and patience, you’ll conquer one of PoE 2’s most challenging pinnacle bosses and claim its legendary rewards.

Best Configuration Tips for MLB The Show 26

MLB The Show 26 delivers a highly detailed baseball simulation, and your settings play a huge role in how well you perform. Whether you’re playing casually or competing in Diamond Dynasty, optimizing your setup can sharpen your reactions, improve control, and make the game feel much smoother overall.

Even small adjustments can help you read pitches more clearly, time your swings better, and execute plays with greater precision.

Why Optimizing Settings Matters

Success in baseball games comes down to timing and accuracy. The right configuration can give you a noticeable advantage by improving both visibility and responsiveness.

With proper settings, you can:

Track incoming pitches more effectively

Improve contact timing at the plate

Increase pitching precision

Reduce delays in input response

Tailor gameplay to your personal comfort level

Many experienced players spend time refining these options early to build consistency throughout their games.Ready to dominate the field? Power up your squad with MLB The Show 26 Stubs from MMOexp and stay ahead of the competition.

Best Batting Configuration

Hitting is one of the toughest skills to master, so your setup here is critical.

Hitting Interface

Zone Hitting is widely considered the best option for players who want full control.

This interface lets you manually move the PCI (Plate Coverage Indicator), allowing precise control over where you make contact with the ball. While it requires practice, it offers the highest skill ceiling and is favored in competitive play.

Other options include:

Directional Hitting:Easier but less accurate
Timing Hitting:Focuses only on swing timing

If you’re aiming to improve long-term, Zone Hitting is the strongest choice.

PCI Customization

Your PCI setup can make pitch tracking significantly easier.

Recommended adjustments:

PCI Center:Diamonds or Basic
PCI Inner:None or Fade
PCI Outer:None
PCI Color:Bright shades like cyan, yellow, or white

Using brighter colors helps maintain visibility against different stadium lighting and pitch speeds.

Batting Camera

Camera angle is crucial for recognizing pitches quickly.

Top choices include:

Strike Zone
Strike Zone 2
Strike Zone High

These perspectives zoom in on the strike zone, making it easier to identify pitch types and react faster.

Best Pitching Setup

Pitching accuracy depends heavily on your chosen interface and camera view.

Pitching Interface

Pinpoint Pitching is the most precise option available.

It rewards accurate stick movements and timing, allowing you to place pitches exactly where you want them. Once mastered, it provides unmatched consistency.

Other alternatives:

Meter Pitching
Pure Analog Pitching
Classic Pitching

While these are easier to pick up, they don’t offer the same level of control.

Pitching Camera

A good camera helps you visualize pitch placement before releasing the ball.

Recommended options:

Pitcher Offset (balanced and widely used)
Pitcher Zoom
Pitcher Wide

Each offers a different perspective, so choose the one that feels most comfortable.

Best Fielding Settings

Defense can make or break a game, especially in close matchups.

Throwing Interface

Button Accuracy Throwing is the most reliable option.

It introduces a timing mechanic that improves throw precision and reduces errors. This is especially useful for double plays and long-distance throws.

Other options:

Button Throwing
Analog Throwing

However, Button Accuracy provides the best balance between control and consistency.

Best Baserunning Settings

Baserunning can quickly become chaotic without proper controls.

Recommended setup:

Baserunning Interface:Button Select
Baserunning Decisions:Assist or Auto

This setup allows you to control individual runners with ease, which is essential for stealing bases, tagging up, and making quick decisions.

Dialing in your settings in MLB The Show 26 can significantly improve your gameplay experience. From mastering Zone Hitting to refining your pitching mechanics, each adjustment helps create a smoother and more responsive feel.Turn every swing into a home run with MMOexp reliable buy MLB 26 Stubs service—your shortcut to building a championship team.

Once your configuration is optimized, you’ll notice better consistency, improved control, and stronger overall performance—whether you’re playing offline or competing online.

Arc Raiders Guide: Mastering Looting During Hurricane Map Conditions

The Hurricane Map Condition in Arc Raiders is one of the most exciting and rewarding events in the game, especially for players who enjoy looting and making money. While most players rush to hit raider caches to farm loot, the market has become oversaturated, making it harder to get unique items. However, by focusing on normal looting during hurricane raids, you can find blueprints, valuables, and still make a solid profit. If you’re looking to boost your gameplay, consider buying ARC Raiders Items to enhance your loot collection and improve your chances during these events. In this guide, I’ll walk you through my strategy for maximizing loot during the hurricane game mode, using the Spaceport as an example. I’ll show you how you can loot buildings efficiently and extract with valuable items without focusing on raider caches.

Loadout & Preparation

To make the most out of looting in hurricane mode, it’s important to bring the right gear. For this run, I’m bringing the following:

1. Looting MK2 – Maximizes the amount of valuables I can carry, thanks to the extra augment slots.

2. Anvil 4 with Silencer 2 – To deal with any arc encounters that may pop up.

3. 15 Adrenaline Shots – To help me move around the map quickly while avoiding storm damage.

4. Raider Hatch Key – To safely extract from the map once I’m done looting.

5. Pro Tip: If you’re not on a high-level account, you can still craft your Raider Hatch Key using the in-round crafting station, as long as you have the materials!

Starting the Raid

Map Overview

The Spaceport is the ideal place for looting during the hurricane condition, and here’s why:

· Departure Building: This building has high loot potential with lockers, desks, and a sensor room.

· Low Traffic: A lot of players are focused on raider caches, so these buildings are often left unlooted, giving you the perfect opportunity to farm valuable blueprints and other loot.

Looting Strategy

Once I spawn into the hurricane map, I’ll typically head toward the Departure Building to start my loot run. If I’m too far from it, I may check nearby raider caches but will avoid getting bogged down by them.

Key Areas to Loot in Spaceport:

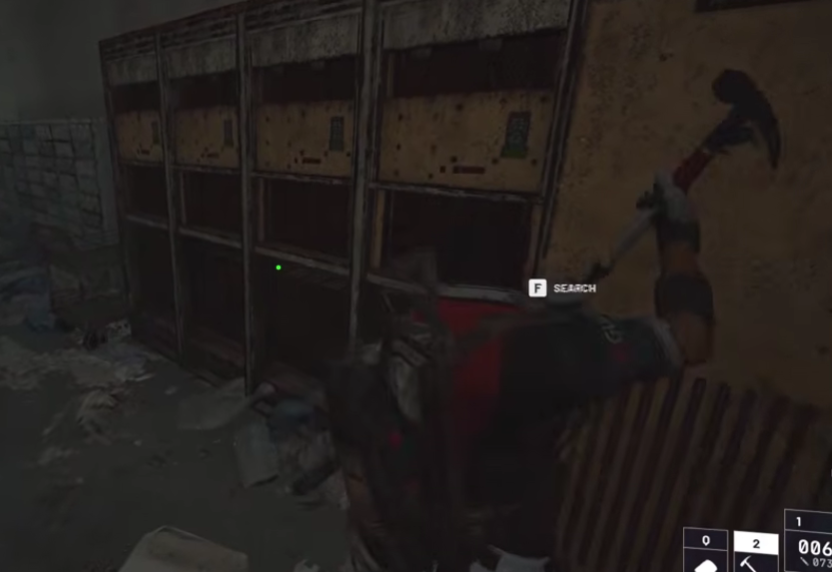
1. Locker Room (Departure Building): The lockers here often contain high-value items like blueprints, valuables, and meds.

2. Example loot: Light Mag 3 blueprint, Fine Wristwatch, Dart Board.

3. Desks: Desks in the departure and other nearby buildings can also yield blueprints and valuables.

4. Example loot: Music Box, Gun Cases, and Light Mag 3 blueprints.

5. Medical Rooms: These areas often contain syringes, sensors, and other useful items like stim shots or plastics for crafting.

6. Red Lockers: These are a goldmine for valuables and materials like springs and processors.

Combat Encounters

While looting, you’ll likely encounter arc threats. Always be prepared to deal with them using your weapons, but don’t let them slow you down too much. If you’re using an Anvil 4 with a Silencer 2, you can quietly eliminate arc enemies, which minimizes the risk of alerting others.

Pro Tip: Always check your surroundings while looting, as players can sometimes sneak up on you while you’re focused on crates or desks.

Looting During the Hurricane

During the hurricane, you’ll face wind and rain, which can slow you down. Adrenaline Shots are key to moving quickly across the map, especially when running against the storm. Sometimes, it’s worth prioritizing quick exits rather than checking every room.

Key Tip: Keep an ear out for any nearby sound cues like beeps, as they can signal the presence of valuable loot or nearby players.

Maximizing Blueprint Farming

One of the best parts about the Hurricane Map Condition is the increased blueprint drop rate. While other players focus on raider caches, you can grab multiple blueprints by looting desks, lockers, and medical rooms.

Blueprint Examples

· Light Mag 3: This one is common in Spaceport and is a great find early on.

· Vertical Grip 3: Another frequently found blueprint that can be very useful.

· Fine Wristwatch: These are 1K each and can add up quickly.

· Pro Tip: While raider caches give you weapons and meds, they’re often not worth the time if you already have plenty of those. Instead, focus on looting for blueprints and valuables in the buildings, especially since many players overlook this aspect.

Avoiding Overcrowded Areas

One major advantage of looting during the hurricane event is that many players focus on raider caches. This means you can get in and out of buildings without running into too much competition, especially in high-traffic areas like the Departure Building or Arrival Building.

Best Strategy

· Loot safe areas that are less likely to be looted by others.

· Prioritize blueprints and valuables over meds and weapons, as these items can give you a higher return on investment.

· Avoiding the raider caches (unless they’re right in your path) can help you save time and reduce competition.

Extraction

Once you’re done looting, head to the Raider Hatch to safely extract. If you’ve been careful and made good choices during your raid, you should leave with a decent amount of valuables, blueprints, and cash.

Pro Tip: Always keep an eye out for nearby players who may be looking to extract at the same time. Use your Raider Hatch Key wisely to ensure a clean escape.

Conclusion

Looting during the Hurricane Map Condition in Arc Raiders can be incredibly rewarding if you focus on buildings and ignore the oversaturated raider caches. By using the Looting MK2, silenced weapons, and adrenaline shots, you can efficiently farm valuables, blueprints, and cash while avoiding direct confrontation. If you’re looking to expand your collection, consider ARC Raiders BluePrints buy to boost your chances of finding rare and valuable blueprints like the Light Mag 3 or Vertical Grip 3. Don’t be afraid to take your time, loot strategically, and always be on the lookout for valuable blueprints. Happy looting, and remember: in Hurricane Mode, the best loot may be just a building away from the chaos! For all your in-game needs, don’t forget to check out MMOEXP for the best deals on resources and loot in Arc Raiders!

OSRS Deadman Mode Guide: Completing “Enter the Abyss” and Maximising Your Points

In the high-risk, high-reward world of Old School RuneScape Deadman Mode, every decision matters. From efficient quest routing to smart resource management, players are constantly searching for ways to gain a competitive edge. Step 8 of your Deadman progression – completing the “Enter the Abyss” quest and cashing in your points – is a crucial milestone that can dramatically impact your success.

This guide breaks down how to complete the quest efficiently, why your points matter, and how strategic use of OSRS gold can further strengthen your Deadman journey.

Step 1: Chronicle Teleport Back to Varrock

The first step in wrapping up “Enter the Abyss” is returning to Varrock quickly and safely. The most efficient method is using a Chronicle tablet, which teleports you directly outside Varrock.

In Deadman Mode, minimising travel time reduces risk. Open-world PvP makes every movement potentially dangerous, so fast teleports are invaluable. The Chronicle is especially useful because it:

·Saves time

·Reduces exposure to PKers

·Places you near key NPCs

·Keeps your route predictable and efficient

Once you arrive in Varrock, head straight toward the Mage of Zamorak to finalise the quest.

Step 2: Speak to the Mage of Zamorak

After teleporting, locate the Mage of Zamorak and initiate dialogue. Speaking with him completes the “Enter the Abyss” quest – a significant achievement in your Deadman progression path.

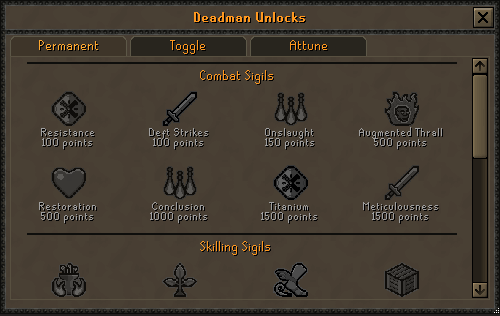
Upon completion, you’ll receive 130 Deadman points, contributing to your overall seasonal total.

The Mage of Zamorak is more than just a quest NPC. He introduces you to the Abyss, one of the most dangerous and rewarding areas for Runecrafting. Understanding how the Abyss works can provide long-term economic benefits, especially for players looking to build consistent income streams.

In Deadman Mode, knowledge equals survival. Efficient Runecrafting through the Abyss can be a steady source of OSRS gold if managed carefully.

Step 3: Collect and Calculate Your Points

Once the quest is complete, your total point count should reach approximately 2580 points. However, if you’ve optimised your progression and obtained two relics earlier in the season, your total can climb to 2980 points.

That’s a massive boost.

Deadman Mode points aren’t cosmetic – they unlock powerful upgrades that influence:

·Combat effectiveness

·Resource efficiency

·Survivability

·Skilling speed

Every point increases your flexibility in a PvP-dominated environment.

Why Deadman Mode Points Matter

Deadman Mode is brutally competitive. Players lose items on death, and progression gaps can widen quickly. A strong point foundation allows you to:

·Unlock stronger relic effects

·Improve combat performance

·Gain faster skilling advantages

·Adapt to evolving meta strategies

Points are essentially your progression currency within the mode.

If you’re serious about competing deep into the season, you must treat points like strategic assets. Smart allocation can be the difference between dominating fights and losing your bank.

The Role of OSRS Gold in Deadman Mode

While points unlock perks, OSRS gold fuels your gear, supplies, and upgrades.

In Deadman Mode, especially, having access to strong equipment early can snowball your advantage. Whether it’s better weapons, higher-tier armour, or faster skilling tools, gold accelerates your growth curve.

Some players strategically convert regular OSRS gold into Deadman Mode gold to gain early leverage. This allows them to:

·Purchase high-tier PvP gear

·Stockpile supplies

·Upgrade faster than competitors

·Replace lost items quickly

Because Deadman Mode includea s high risk of item loss, maintaining strong liquidity in OSRS gold ensures you can recover from setbacks.

When to Consider Upgrading Your Setup

If you find yourself falling behind in gear progression or struggling to maintain supplies, it may be time to strengthen your economy.

Some players choose to buy OSRS items to quickly close progression gaps – especially in competitive seasonal environments like Deadman Mode. Acquiring key upgrades early can drastically improve your win rate in PvP scenarios.

However, regardless of your approach, the key principle remains the same:

Momentum wins Deadman Mode.

If you maintain momentum – through points, gold, and optimised routing – you stay ahead of the curve.

Smart Resource Management in Deadman Mode

To truly maximise Step 8’s rewards, combine your point advantage with solid economic planning:

1. Protect Your Wealth

Avoid unnecessary risk zones unless profit outweighs danger.

2. Upgrade Strategically

Invest OSRS gold into gear that provides the highest PvP return value.

3. Diversify Income

Use Abyss Runecrafting, Slayer, or flipping strategies to maintain a steady gold flow.

4. Plan for Death

Deadman Mode guarantees setbacks. Keep reserve OSRS gold to rebuild quickly.

Turning Points into Power

After completing “Enter the Abyss” and securing nearly 3000 points, you’re entering a powerful mid-game stage.

This is where players separate into two groups:

·Those who capitalise on their momentum

·Those who stall and fall behind

If you reinvest your rewards wisely, your advantage compounds.

Strong relic synergy + strong gear + stable OSRS gold reserves = long-term dominance.

Final Thoughts: Dominate Deadman Mode

Step 8 of your Deadman journey isn’t just another checkpoint – it’s a launchpad.

By:

·Efficiently teleporting with Chronicle

·Completing “Enter the Abyss”

·Securing nearly 3000 points

·Managing your OSRS gold wisely

You position yourself for success in one of RuneScape’s most unforgiving game modes.

For players who want to maximise efficiency and stay competitive, maintaining strong gold reserves and choosing reliable sources to buy OSRS items can provide the extra boost needed to outpace rivals.

Deadman Mode rewards preparation, strategy, and decisive action. Complete your quest, cash in your points, strengthen your economy, and step confidently into the chaos.

Where to Get the Dam Surveillance Key in ARC Raiders

Keys are an important part of progression in ARC Raiders, often granting access to secured locations packed with valuable loot. One key that many players seek out is the Dam Surveillance Key. While it doesn’t appear in a fixed spot, understanding where it can drop—and how to use it—will significantly improve your looting efficiency.

The Dam Surveillance Key follows ARC Raiders randomized loot rules, meaning its spawn location changes between matches. There’s no single guaranteed place to pick it up, but players can improve their odds by targeting areas where small utility ARC Raiders Items commonly appear.

Residential areas are your best bet. These zones contain multiple searchable containers that frequently roll keys. Focus on the following:

Drawers and storage cabinets:Found throughout houses and apartments, these containers are easy to overlook but are capable of spawning keys alongside minor loot.

Suitcases:Scattered across living spaces, suitcases—both locked and unlocked—are another reliable source and should always be checked.

Although the key is tied to the Dam Battlegrounds, it isn’t limited to that map when spawning. Because of this randomness, careful looting during every raid is encouraged. Take your time and fully search buildings instead of rushing through them.

Where to Use the Dam Surveillance Key

After securing the key, it’s important to know that it only unlocks one specific location—but the rewards inside make the effort worthwhile.

Water Treatment Control Building Location

The Dam Surveillance Key is used inside the Water Treatment Control building, located on the southern edge of the Dam Battlegrounds map.

To reach the locked room efficiently:

1.Enter the building through the southern entrance.

2.Take an immediate right at the first interior opening.

3.Turn right again—the locked room will be positioned in the corner.

This route allows quick access with minimal wandering, helping you secure the loot before danger escalates.

Loot Found Inside the Locked Room

Unlocking the surveillance room opens access to several high-value loot sources:

Red Lockers

Uncommon and higher-tier weapons

Rare crafting materials

Grenades useful for combat encounters

Raider Containers

Weapon cases that may contain rare firearms

Grenade tubes for added firepower

Raider bags to increase inventory capacity

Ammo cases to keep supplies topped up

Terminal Loot

Advanced electrical components

Wires and magnets used for crafting and gear upgrades

While the Dam Surveillance Key may take some patience to find, a thorough search of residential areas greatly increases your chances. Once unlocked, the Water Treatment Control room provides consistent, high-quality loot that can boost both your survivability and progression.

For players focused on upgrading gear or collecting valuable cheap ARC Raiders Materials, tracking down this key is well worth the effort.Unlock your full potential in ARC Raiders with premium items delivered fast and securely from MMOexp.